Filter Replacement Instructions
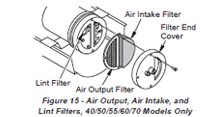
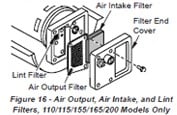
Air Output, Air Intake, and Lint Filters
- Remove upper shell
- Remove filter end cover screws using 5/16″ nut driver
- Remove end cover
- Replace air output and lint filters
- Wash or replace air intake filter
- Replace filter end cover
- Replace fan guard and upper shell
Pump Pressure Adjustment
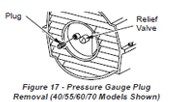
- Remove pressure gauge plug from filter end cover
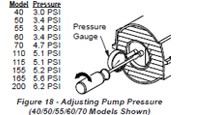
- Install accessory pressure gauge
- Start heater and allow motor to reach full speed
- Adjust pressure. Turn relief valve to right to increase pressure. Turn left to left to decrease pressure.
- Remove pressure gauge. Replace pressure gauge plug in filter end cover.
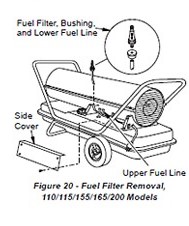
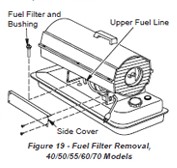
Fuel Filter
- Remove side cover screws using 5/16″ nut driver
- Remove side cover
- Pull upper fuel line off fuel filter neck
- Carefully pry bushing, fuel filter, and lower fuel line out of fuel tank(110/115/155/165/200 models only)
- Wash fuel filter with clean fuel and replace in tank
- Attach upper fuel line to fuel filter neck
- Replace side cover